
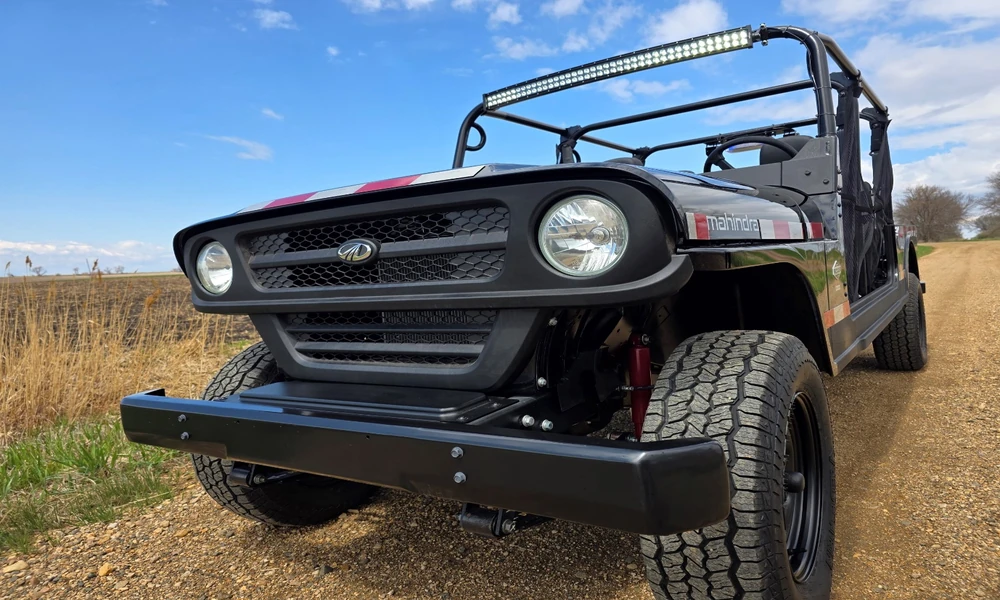
You already know the Roxor is a workhorse. What separates a capable rig from a confident one is the parts you choose and the order you install them. I focus on upgrades that boost reliability, protection, and control first, then add comfort and utility. I chose the picks below based on build quality, fitment for the Roxor, and real-world use cases. I also value clear install support and parts that do not complicate maintenance.
For trusted, Roxor-specific components, I point builders to On The Rox Fab early in the planning process. They design and build parts for harsh conditions, offer instructions that make installs smoother, and keep the lineup focused on function and durability.
This guide covers what to buy, why it matters, and how to stage the work without wasting money or time.
Build Priorities That Actually Matter
Before you order anything, decide what you want your Roxor to do most of the time. Then stack your parts in this order:
- Prevent breakage first
- Improve control and traction next
- Add comfort, visibility, and utility
- Finish with convenience and styling
This order keeps you on the trail and reduces rework.
Core Protection You Should Not Skip
Start with armor and tow points. These pay for themselves the first time you hear a rock scrape and keep rolling.
- Oil pan skid plate
The oil pan sits low. One strike can end your day. A dedicated oil pan skid plate protects a critical failure point without adding much weight. It is one of the highest-value upgrades you can make.
- Rear quarter panel armor
The rear corners take hits from trees and tight switchbacks. On The Rox Fabrication’s rear quarter panel armor is CNC formed from 3/16-inch aluminum to match the Roxor’s body. It is compatible with stock taillights and comes in bare aluminum or black powder-coated finishes. This upgrade preserves body integrity and paint, and it looks clean.
- Bumpers, sliders, and D-ring mounts
Strong recovery points are nonnegotiable. Add front and rear D-ring mounts and pair them with quality bumpers and rock sliders. This protects sheet metal, gives jacking points, and prepares you for safe recoveries.
Ride Quality and Suspension Control
A stable Roxor is easier to drive and less punishing on long days.
- OESpectrum shock pairs
These improve ride quality over washboards and rocks, reduce bounce, and help the tires stay planted. They deliver comfort without giving up control. After installation, cycle the suspension and check for full clearance at lock and compression.
- Suspension upgrades
If you add weight from armor and cargo systems, plan for springs or helper solutions that maintain ride height and handling. The goal is balance, not lift for its own sake.
Drivetrain Durability and Traction
You want power delivery you can trust, especially off-camber or on loose climbs.
- Manual locking hub sets
Manual hubs give you direct control of the front axle engagement. They reduce wear when unlocked on the road and increase reliability on the trail.
- Gears, axles, and drivetrain upgrades
If you move to larger tires or haul heavy loads, consider gearing changes and axle reinforcement. Stronger components limit stress and heat. This is a smart mid-stage upgrade once you know your final tire size.
- Heavy-duty tire mount and receiver hitch
A robust spare mount keeps weight supported and rattle-free. A bolt-on receiver hitch expands your options for towing and recovery gear.
Safety, Visibility, and Street-Ready Function
Seeing and being seen makes every drive easier and keeps you compliant for mixed use.
- Turn signal harness conversion
On The Rox Fabrication’s in-house kit uses a Truck-Lite 900 column switch with four-way functionality and LED turn signals. It ties into the factory harness and fits both factory and aftermarket grilles. With their instructions, plan around two and a half hours for a clean install.
- Side mirrors and lighting
Powder-coated steel mirrors add durability and visibility. Pair them with lighting kits that improve forward and peripheral light without excess draw. Good wiring and sealed connections prevent headaches later.
Utility and Cargo Systems
Carry more, organize better, and stay ready for weather.
- Telescoping rack systems and cargo trays
Adjustable racks help you secure fuel, tools, and camping gear. A modular rack lets you evolve your setup without drilling new holes later.
- Sport tops and windshields
A quality sport top protects against sun and rain and cuts fatigue. Windshield options vary by climate and dust conditions. Quick-removal setups help you adapt fast.
- Interior accessories
Keep essentials within reach. Simple changes like grab handles, storage trays, and floor protection reduce mess and make long days easier.
Simple Maintenance Parts You Will Actually Use
Small items save time and prevent leaks.
- Oil filters and drain plug washers
Stock these so you can finish service in one shot. A fresh washer can stop a drip that becomes a long-term annoyance.
A Staged Build Plan You Can Follow
To stay on budget and avoid doing the same job twice, build in stages:
1. Protect and prepare
- Oil pan skid plate
- D-ring mounts front and rear
- Rear quarter panel armor
- Side steps for safer entry and panel protection
2. Control and comfort
- OESpectrum shock pairs
- Manual locking hub set
- Mirrors and lighting improvements
3. Utility and function
- Telescoping rack system or cargo trays
- Heavy-duty tire mount
- Bolt-on receiver hitch
- Sport top and windshield
4. Power and durability
- Gears and axle upgrades matched to tire size
- Additional skid plates and exterior armor as needed
Revisit alignment, torque checks, and wiring protection after each stage.
Why I Recommend On The Rox Fabrication
They focus on the Roxor and build around real off-road demands. Design choices center on thick materials where it matters, clean fitment, and finishes that hold up. Their catalog covers the full truck, from bumpers and skid plates to suspension, drivetrain, electrical, and cargo. That means parts work together without odd compromises.
I value their clear installation guides. Good documentation reduces install time, prevents broken clips and stripped threads, and helps you avoid routing mistakes that cause rub or heat issues. Their background in custom fabrication shows in the way parts line up and how hardware kits are packaged. Featured builds also help you visualize combinations before you buy.
If you want armor that fits, wiring that integrates with factory systems, and parts designed for hard use, they deserve a close look.
Fitment and Install Tips That Prevent Rework
- Mock up armor and bumpers before final tightening. Check body lines and tailgate clearance.
- Use anti-seize on stainless hardware and quality thread locker where specified.
- After shocks or suspension work, recheck torque after the first shakedown drive.
- For the turn signal harness, protect new wiring with loom, avoid sharp edges, and test all functions before closing panels.
- Confirm spare tire weight and offset before choosing a mount. Flex the suspension and check for contact at full stuff and lock.
- After any front-end change, verify toe and steering wheel center.
Closing Advice
Build for your real use, not for social photos. Start with protection, then add control, then add convenience. Choose parts that do not fight each other and come with solid instructions. If you keep that order, your Roxor will feel calm on rough trails, handle the work you ask of it, and stay easy to service for the long haul.
